Altimètre / Altimeter

Altimètre / Altimeter

Altimètre

L’altimètre permet de se situer dans le plan vertical. La combinaison carte/boussole/altimètre permet une orientation très précise dans le terrain

L’altimètre est un baromètre; Il mesure la pression de l’air. La pression de l’air diminuant avec l’altitude, chaque modification d’altitude est donc enregistrée par l’altimètre.

Le cadran est étalonné, non pas en unités de pression mais en mètres.

Mais comme la pression varie également en fonction des conditions météorologiques, l’altimètre doit être régulièrement réajusté. Il faut le faire à chaque fois que l’on se trouve à un endroit dont on connaît l’altitude. Plus d’infos sur l’altimètre.

L’usage de l’altimètre est précieux. En particulier lors de traversées à flanc de montagne et par temps de brouillard. L’utilisation combinée de la carte, de la boussole et de l’altimètre permet de localiser avec précision sa position dans le terrain.
Un altimètre étant aussi un baromètre, il peut servir à anticiper les variations météo.

Pour de plus amples informations sur le choix et l’utilisation d’un altimètre se référer à l’ article du Spéléo Groupe La Tronche.

Altimeter

The altimeter allows you to locate your position vertically. The combination of map/compass/altimeter allows you to orientate yourself very precisely in the terrain.

The altimeter is a barometer; it measures air pressure. Air pressure decreases with altitude, so every change in altitude is recorded by the altimeter.

The dial is calibrated not in units of pressure but in metres.

But as pressure also varies according to weather conditions, the altimeter needs to be readjusted regularly. You need to do this every time you are in a place where you know the altitude. Find out more about altimeters.

The use of an altimeter is invaluable. Particularly when crossing mountains and in fog. The combined use of a map, compass and altimeter allows you to pinpoint your position in the terrain.
As an altimeter is also a barometer, it can be used to anticipate changes in the weather.

For more information on choosing and using an altimeter, see the article by the Spéléo Groupe La Tronche.

Altimètre / Altimeter

Boussole / Compass

La boussole

La boussole permet de s’orienter dans le plan horizontal. La combinaison carte/boussole permet de déterminer une direction à suivre ou bien l’endroit où l’on se trouve

Elle comporte une aiguille aimantée qui indique le nord, un cadran divisé en 360 degrés ou 400 grades, une ligne de visée et un miroir permettant de voir en même temps la ligne de visée et l’aiguille aimantée.

Dans les Alpes, le nord magnétique fait un angle d’environ 3 degrés vers l’ouest avec le nord géographique.

Pour déterminer le nord géographique, tourner le cadran gradué de façon que le N, l’index nord, soit sur la ligne de visée. Tourner l’ensemble de la boussole en la maintenant horizontale jusqu’à ce que l’aiguille aimantée se place sur la graduation 357 d’un cadran divisé en 360 degrés. La ligne de visée indique alors le nord géographique.

Faire toujours attention à ce que la boussole soit maintenue bien horizontale.
Qu’elle soit tenue à bout de bras ou posée sur la carte, la partie ou se trouve le cadran (et l’attache du cordon) doit être orientée vers l’endroit où se trouve l’observateur.

Le site de la marque Recta donne des informations utiles sur Utilisation de la boussole.

Plus d’infos sur l’utilisation de la boussole.

The compass

The compass allows you to orient yourself horizontally. The map/compass combination can be used to determine a direction to follow or a location.

It has a magnetised needle that indicates north, a dial divided into 360 degrees or 400 grades, a line of sight and a mirror so that the line of sight and the magnetised needle can be seen at the same time.

In the Alps, magnetic north makes an angle of around 3 degrees west with true north.

To determine true north, turn the graduated dial so that the N, the north index, is on the line of sight. Turn the entire compass, keeping it horizontal, until the magnetised needle is positioned on scale 357 of a dial divided into 360 degrees. The line of sight then indicates true north.

Always ensure that the compass is kept horizontal.
Whether it is held at arm’s length or placed on the map, the dial part (and the cord attachment) must be pointing towards the observer’s position.

The Recta website provides useful information on using a compass.

Find out more about using the compass.

Altimètre / Altimeter

Cartes topographiques / Topographic maps

Les cartes topographiques

♦ Echelle   ♦ Relief   ♦ Orientation   ♦ Cartes en ligne

L’échelle

C’est le rapport entre la distance réelle sur le terrain et sa représentation sur la carte.

Les cartes utilisées pour les courses en montagne sont à l’échelle 1/50 000 ou 1/25 000.

1/50 000 signifie que 1 cm sur la carte représente 50 000 cm = 500 m sur le terrain; 1/25 000 signifie que 1 cm sur la carte représente 25 000 cm = 250 m sur le terrain.

Le relief

Le relief est représenté par les courbes de niveaux. Une courbe de niveau est une ligne qui joint les points de même altitude.

Plus les courbes sont serrées, plus la pente est raide.

La différence d’altitude entre les courbes de niveau est l’équidistance. Elle est indiquée sur la carte et varie suivant l’échelle de la carte, parfois même suivant les zones de la carte si celle-ci est le résultat d’un assemblage de cartes pour couvrir tout un massif.

Pour faciliter la lecture, une courbe sur cinq (ou sur dix) est plus épaisse et porte une cote d’altitude, c’est la courbe maîtresse.

Les cartes récentes comportent un ombrage, le soleil étant au nord-ouest.

L’orientation de la carte

La carte est toujours cadrée de façon que ses bords latéraux aient une direction sud-nord (du bas vers le haut). Orienter la carte, c’est faire coïncider le nord géographique avec le nord de la carte. La carte étant orientée, les directions sur celle-ci correspondent aux directions sur le terrain.

Apprendre à lire une carte

Voir le site dédié de l’IGN.

Cartes topographiques en ligne

Topographic maps

♦ Scale  ♦ Relief  ♦ Orientation  ♦ Online maps

The scale

This is the ratio between the actual distance on the ground and its representation on the map.

The maps used for mountain tours are at a scale of 1:50,000 or 1:25,000.The maps used for mountain tours are at a scale of 1:50,000 or 1:25,000.

1/50,000 means that 1 cm on the map represents 50,000 cm = 500 m on the ground; 1/25,000 means that 1 cm on the map represents 25,000 cm = 250 m on the ground.

The relief

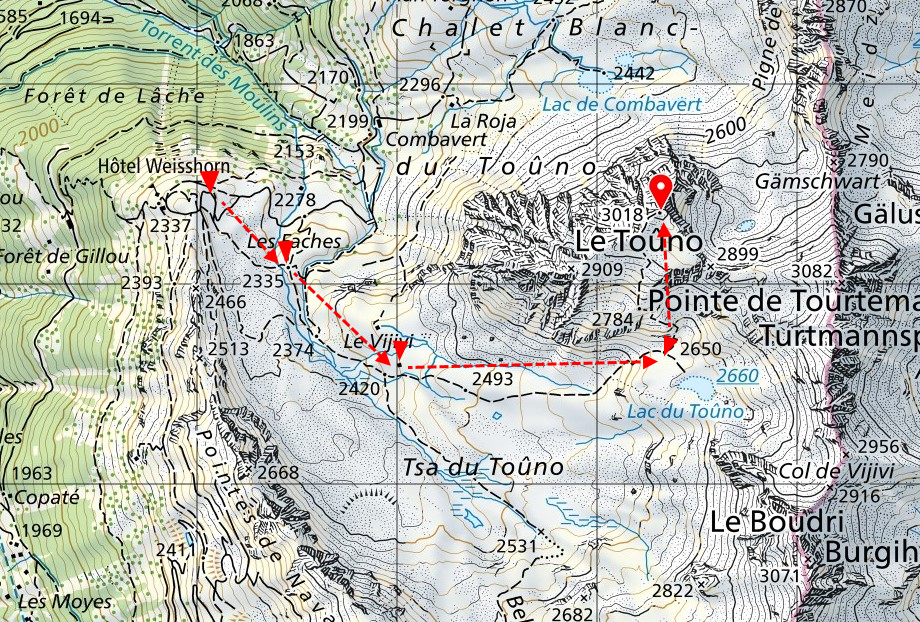
Relief is represented by contour lines. A contour line is a line joining points of the same altitude.

The tighter the curves, the steeper the gradient.

The difference in altitude between the contour lines is the equidistance. It is indicated on the map and varies according to the scale of the map, and sometimes even according to the zones of the map if it is the result of assembling maps to cover an entire massif.

To make it easier to read, one curve in five (or ten) is thicker and bears an altitude number: this is the master curve.

Recent maps show shading, with the sun to the north-west.

Map orientation

The map is always framed so that its side edges run in a south-north direction (from bottom to top). Orienting the map means making geographical north coincide with the north of the map. As the map is oriented, the directions on it correspond to the directions on the ground.

Learning to read a map

See the dedicated IGN website.

Topographic maps online

Map.Wanderland.ch — the whole of Switzerland online
Geoplanet.vd.ch — the State of Vaud’s mapping office
SITN.ne.ch — Neuchâtel Land Information System
SwissTopofrom the Federal Office of Topography
Google Maps — Google website
Useful links — maps, atlases and town plans

Orientation Avant-propos / Orientation Foreword

avant-propos sur les
différentes techniques d’orientation

« Pour savoir où l’on va, il faut savoir où l’on est ! »
selon l’adage

« Qui prend conseil franchit la montagne ;
qui n’en prend point fait fausse route même en plaine »
proverbe Turc

En montagne il est indispensable de connaître les différentes techniques d’orientation. L’arrivée du GPS peut apporter une aide non négligeable, mais cela doit rester un complément. Les techniques de bases doivent être maîtrisées malgré tout.

Pour atteindre l’endroit où l’on se propose d’aller, et surtout pour revenir en toute sécurité, il existe toute une série d’outils et de moyens.


Savoir utiliser ces outils est un gage d’autonomie et de sécurité

foreword on
different orientation techniques

« To know where you’re going, you have to know where you are »
as the saying goes

« who takes advice crosses the mountain;
who takes none takes the wrong road, even on the plain »
Turkish proverb

In the mountains, it’s essential to know the different orientation techniques. The arrival of GPS can be a great help, but it should remain a complement. The basic techniques still need to be mastered.

There are a whole range of tools and means available to get you to where you want to go, and above all to get you back safely.


Knowing how to use these tools is a guarantee of autonomy and safety

Altimètre / Altimeter

Pharmacie de poche / Pocket pharmacy

Pharmacie pour les courses

Elle peut être réduite car l’efficacité du secours n’est pas fonction de la quantité de médicaments
mais de la bonne connaissance de quelques gestes simples.

Les médicaments et matériels énumérés ci-dessous doivent être considérés comme de simples exemples.

Pour une cordée de deux et une course de un à deux jours

  • Désinfectant non agressif
  • Pansement combiné pour plaies et brûlures
  • Cartouche de gaze
  • Triangle de toile
  • Paquet de pansements adhésifs
  • Rouleau de sparadrap
  • Bande élastique de fixation
  • Pansements de protection contre les ampoules, type « Kurotex »
  • Épingles de sûreté
  • Petits ciseaux
  • Pincettes
  • Comprimés d’aspirine
  • Comprimés contre les maux d’estomac et les diarrhées
  • Couverture de survie
  • Matériel pour écrire
  • Sifflet, miroir, éventuellement stylo lance-fusées pour donner l’alarme.

Il est bon de disposer en toutes circonstances d’une ration de survie
… et d’eau (sinon de matériel pour faire fondre de la neige).

First-aid kit for mountain tours

It can be reduced because the effectiveness of the rescue does not depend on the quantity of medication
but on the knowledge of a few simple gestures.

The medicines and equipment listed below should be considered as examples only.

For a party of two and a one- or two-day trip

  • Non-aggressive disinfectant
  • Combination dressing for wounds and burns
  • Cartridge of gauze
  • Canvas triangle
  • Pack of adhesive dressings
  • Roll of plaster
  • Elastic band for fastening
  • Blister protection plasters, « Kurotex » type
  • Safety pins
  • Small scissors
  • Tweezers
  • Aspirin tablets
  • Tablets for stomach upsets and diarrhoea
  • Survival blanket
  • Writing materials
  • Whistle, mirror and, if necessary, flare pen to sound the alarm.

It’s a good idea to have a survival ration on hand at all times
…and water (if not snow-melting equipment)